How often do feel guilty about watching Netflix series instead of doing preparation for your next week’s math exam? Do you remember the last time you’ve set a goal (like to lose weight by 5kg) by the next 3 months, but at some point just forgot about that for the long long months until yet another life event trigger reminds you about that goal? If so, then you are not alone. I constantly struggle with keeping myself on track with moving from where I am to where I want to be. That doesn’t mean there is no progress in reaching desired goals, but rather an underling the fact, that there is always a “fight” inside me, between a quick small reward (such as watching YouTube) and doing something which will not bring instantly visible payoff, but it is a small step to the big desired goal. There is a popular sports proverb
No Pain, No Gain
Even though I believe it is absolutely true, that doesn’t mean we have to suffer on our way to reaching long-term goals. There is no chance for this post to discover any unknown secrets of our brain, but maybe techniques that work for me will help someone else in their own “internal fight with themselves”.
Fresh Start
I believe almost everyone is familiar with the concept of New Year Resolutions. Even if according to statistics only 9% of them are successful, does not mean they are useless. The same statistic source says:
“In comparison, of those people who have similar goals but do not set a resolution, only 4% are still successful after 6 months.”
https://discoverhappyhabits.com/
So even from a pessimistic point of view, 9 is much much better than 0. In addition to that, there is no need to wait for the next year to start doing gym or eat more healthy. A fresh start could be any day (even today 😉 ). Even if we as human beings usually tend to find a huge symbolic date as New Year, it is always possible to find a meaningful fresh start date without waiting till the end of December, e.g. by using such websites as timeanddate.com which provide different calendars.
*Fun fact, the day I started writing this blog post is Jan 16, and due to timeanddate.com, today is a Nothing Day. Isn’t it a perfect time to start something new in our life? 😉
So just remember that fresh starts increase your motivation to change because they can give you either a real clean slate or the impression of such one.
Present Bias
Do you prefer to scroll newsfeed on Facebook for 5 (or maybe 55 minutes) or do 4 hours boring course of investment basics? Well, my honest answer is Fb newsfeed, and … this is normal behavior of the human brain and this is called impulsivity or a Present Bias. In a nutshell, present bias is
The tendency to favor instantly gratifying temptations over a larger long-term rewards
This means that our brain always tends to choose fun useless (or even destructive) pursuits over some boring but useful activities. But there is a small trick, we always can try to combine “fun” and “useful”. Yeah, now I sound like a Captain Obvious, but for me, that was not so obvious, or at least valuable before I tried that on my skin.
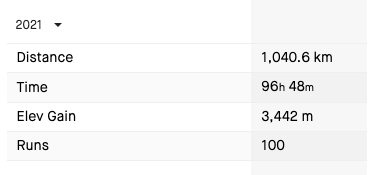
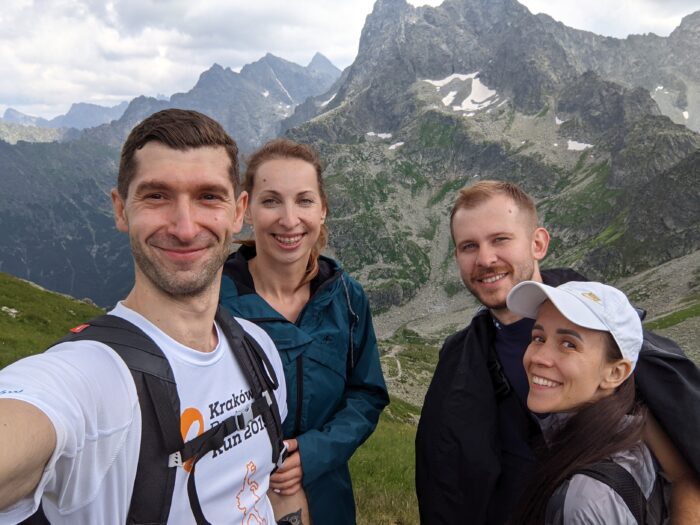
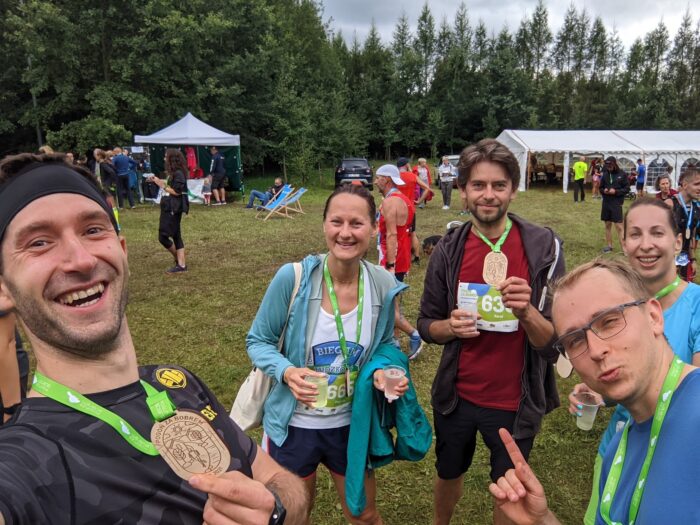
So in my case, I adore the podcast Music with History, but some episodes could take up to 2 hours to listen to, almost always it’s “too expensive” in terms of time. But sometimes this temptation to listen to that was stronger than my willpower and after listening I felt a bit guilty that now I don’t have time to do other things. So the solution for me in that situation was to combine a long run (which I’m not the biggest fan of at all, but it helps to keep my spine in a good enough condition) with listening to my favorite podcast. Now, when I want to listen to the new episode, I know that for doing that I have to do at least a 15-kilometer run, and at the very end, it brings a double satisfaction: a – satisfaction of doing something useful, b – the satisfaction of doing something I was waiting for the whole week 😉.
So my small tip at this point is to create a “Gamification” connection between things you “want” and “have” to do. It can help reduce overindulgence in temptations and increase time spent on activities that serve long-term goals.
Procrastination
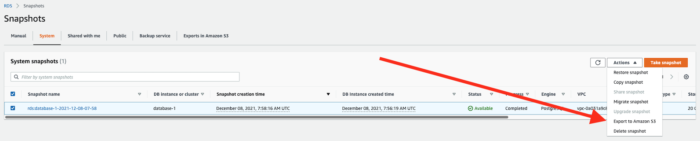
Procrastination is another evil that tries to put us away from our goals. This one is very connected with Present Bias, but I found additional ways to handle procrastination such as “commitment devices”. So, whenever you do something that reduces your own freedoms in the service of a greater goal, you’re using a commitment device. An example is a “BlockSite” app that prevents you from visiting web pages like YouTube or Facebook until you’ve finished your working day between 9 AM and 5 PM.
There are 2 types of “commitment devices”: hard (e.g. cash commitment devices which allow creating a financial incentive to meet the goal by letting put money on the line that you’ll forfeit if you don’t succeed) and soft (e.g. public pledges, that increase the psychological cost of failing to meet your goals).
The costs we can impose on ourselves to help with goal achievement range from soft penalties to penalties. There are also soft restrictions (such as eating from a smaller plate) and hard restrictions (such as putting money on a deposit locked account). The softer the penalty or restriction, the less likely it is to help with change, but the more palatable it is to adopt.
Forgetfulness and Laziness
Well, last but definitely not least is forgetfulness and laziness. I’ve generalized those 2 things even they are not the same because the tool helps me work for both of these “sins”. The main word in this section is planning.
So for example timely reminders, which prompt you to do something right before you’re meant to do it, can effectively combat forgetting. Also, sometimes such reminders could be triggered all at once (e.g. in the morning after breakfast), which helps to plan the whole day.
Forming cue-based plans is another way to combat forgetting. These plans link a plan of action with a cue and take the form “When **** happens, I’m going to do ****”. Cues actually can be anything that triggers your memory, from a specific time or location to an object you expect to encounter.
Planning also has other benefits, e.g. it helps to break your goals into “bite-size” chunks, relieves you of the need to think about what you’ll do at the moment, and acts as a pledge to yourself, thereby increasing your commitment to your goals.
Repetitive plans could help to build habits, which are like a default setting for our behavior. The more you repeat an action in familiar circumstances and receive some rewards, the more habitual and automatic your reaction becomes in those situations. Such default setting is the outcome you’ll get if you don’t actively choose another option. If you select defaults wisely, you can turn laziness into an asset that facilitates changes.
Final Thoughts
The very final thing I wanted to underline, is that there is no golden bullet that will change your life and makes you not forgetful, not lazy, or not procrastinating person. There are only tools that could help you to mitigate these temptations. We just have to remember that achieving transformative behavior change is more like treating a chronic disease than healing after a cold. You can’t just drink some paracetamol tea and expect it to disappear forever. All of these “symptoms” won’t just go away once you’ve started “treating” them. They’re human nature and require constant vigilance.
P.S.
I very much enjoyed reading a book that helped me to understand my own attitude to good/bad habits and inspired me to write this post. A lot of things described by me above were written by Katy Milkman in her book “How To Change“. I highly recommend that for people like me, who want to improve “self-discipline” and integrate good habits in daily life.